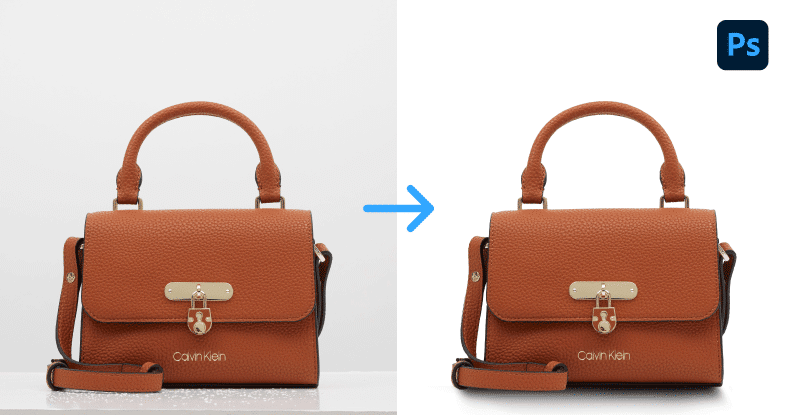
Are you running a Shopify store and struggling to get those perfect product images that convert visitors into buyers? High-quality visuals are key to creating a professional and trustworthy shopping experience. With some simple techniques, you can take the best pictures for your Shopify store, even without a professional photographer.
1. Know the Image Sizes
 To take the best pictures for your Shopify store, the first step is ensuring that your images are optimized for Shopify's specifications. For product images, Shopify recommends a square image size of 2048 x 2048 pixels for high-quality display and zoom functionality. The minimum size should be 800 x 800 pixels, especially if you want customers to zoom in for detail. Keeping file sizes around 100-300 KB helps with faster page loading without sacrificing image quality.
Here’s a breakdown of the image sizes you'll need for different areas of your Shopify store:
- Product images: 2048 x 2048 px (ideal), minimum of 800 x 800 px.
- Banner images: 1200-2500 px wide and 400-700 px tall.
- Background images: 1920 x 1080 px, 16:9 aspect ratio for fullscreen visuals.
- Logos: For header logos, around 400 x 100 px is common, while 200 x 200 px works well for footers.
Keeping image sizes consistent across your store not only enhances the user experience but also improves your site’s loading speed and overall SEO. You can compress images using tools like TinyIMG to maintain speed and performance.
This setup ensures your photos are ready to present your products professionally while maintaining fast load times for a smooth shopping experience.
2. Focus on Clean Backgrounds

Using a clean background keeps the focus on your product. A white or neutral backdrop often works best for eCommerce sites.
The background of your image plays an important role in making your product stand out. Cluttered backgrounds can distract potential customers. Here’s how to achieve the best result:
White Backdrop
A white backdrop is a go-to choice for most product photos. It keeps the focus on the product and creates a uniform look across your site.
Use Backdrop Papers or Sheets
For a smooth, professional look, you can use paper backdrops. They’re affordable and come in a variety of colors to match your branding.
AI-Generated Backgrounds
Using AI tools like Assembo.ai, you can create custom backgrounds that match the theme of your store. Whether you want something minimalist or more creative, AI-generated backgrounds are quick and effective.
3. Showcase Multiple Angles

Customers need to see all sides of your product before they decide to make a purchase. Capture every detail with multiple angles.
Online shoppers rely on product images to visualize the item they’re purchasing. To offer a full perspective, take photos from different angles.
Front, Side, and Back Views
Showing your product from the front, side, and back helps the buyer get a complete idea of the item. This is especially useful for apparel, accessories, and gadgets.
Detail Shots
If your product has intricate details, take close-up shots to highlight them. This could be stitching on clothing, textures, or unique features like buttons or engravings.
Lifestyle Shots
In addition to static product shots, consider adding lifestyle photos where your product is being used. This provides context and helps customers imagine it in their own lives.
4. Invest in Good Lighting
Good lighting can make or break your product photos. Natural light or affordable softboxes can enhance the look of your products.
Lighting is the foundation of any great photo. Poor lighting can result in unclear images, affecting your product’s presentation. Here’s what to consider:
Natural Light for Simplicity
If you don’t want to invest in studio lights, using natural light from a window can work wonders. The soft, diffused light from the sun will make your products look their best.
Affordable Softbox Lighting
Softbox lighting kits can provide professional results on a budget. They create a soft, balanced light that reduces harsh shadows. This is great for product clarity and detail.
Reflectors for Shadows
Using a simple reflector can bounce light onto the darker parts of your product, softening shadows and ensuring even lighting across the frame.
5. Edit Your Photos for Professional Results

Editing can take your photos to the next level. Cropping, adjusting brightness, and tweaking colors help make your product shine.
Even the best-shot photos often need some post-processing to look polished and professional. Here’s how you can enhance your images:
Crop and Resize
Make sure your photos are cropped to the right dimensions for Shopify. A consistent aspect ratio ensures uniformity across your store, while resizing keeps load times fast.
Adjust Brightness and Contrast
Sometimes photos can appear dull straight out of the camera. Boosting brightness and contrast can bring life to the image, making your product look more appealing.
Remove Imperfections
Use photo editing tools to remove any unwanted spots, dust, or imperfections from your images. Tools like Photoshop or Canva are popular choices for this.
Final Thoughts
Taking the best photos for your Shopify store doesn’t require a massive budget or professional gear. By focusing on lighting, using a clean background, showcasing all angles, and ensuring sharpness, you can significantly improve the quality of your images. With AI tools like Assembo.ai, you can also create custom backgrounds and edit your photos with ease, giving your store the professional look it needs to thrive.
