
Jewelry photography requires precision, care, and creativity to highlight the fine details and shine of your products. Whether you're selling pieces online or capturing them for personal use, these top 10 jewelry photography setup tips will ensure your images look stunning and professional.
1. Clean Your Jewelry Thoroughly
:strip_icc()/GettyImages-1312677834-6061d2d4c96740ffa595378c95826e8b.jpg)
Before you even begin taking photos, make sure your jewelry is completely clean. Dust, smudges, and fingerprints will be painfully obvious in your final images, especially when using a macro lens. These imperfections can dull the sparkle of gemstones and reduce the appeal of metal surfaces.
Jewelry Cleaning Checklist:
- Use a soft toothbrush and a mild cleaning solution to scrub intricate details.
- For gemstones, use a polishing cloth specifically designed for delicate surfaces.
- Carefully dry the jewelry to avoid watermarks before photographing.
- Use a lint-free cloth to make sure the jewelry stays clean while handling.
For best results, avoid touching the jewelry directly with your fingers once it’s cleaned. Tweezers or cotton gloves are ideal for handling jewelry during the shoot to maintain cleanliness. Learn more on how to prepare jewelry for photography.
2. Use Assembo.ai for Custom Backgrounds
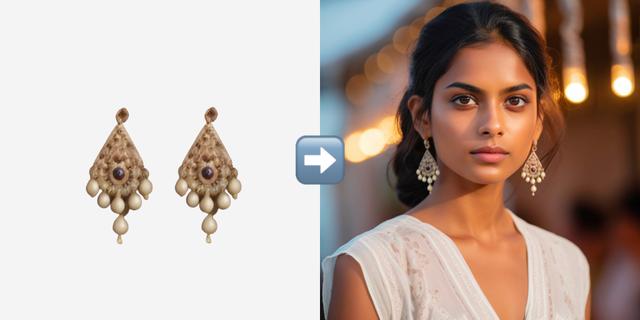
The right background can make or break your jewelry photos. If you're looking for custom, professional backgrounds that fit your jewelry perfectly, try using Assembo.ai. This AI tool allows you to create unique backgrounds that enhance your jewelry without drawing attention away from the piece itself.
How It Works:
- Upload your jewelry image to Assembo.ai.
- Select or generate a custom background that matches the style or mood of your jewelry.
- The AI automatically blends your product with the background seamlessly.
With Assembo.ai, you can try different background styles, from classic white to textured surfaces, without needing to set up a physical background in your studio. It’s also a cost-effective way to get variety in your shots without spending hours on manual editing.
Read more on creating stunning backgrounds with AI.
3. Focus on the Design/Gemstones

Jewelry with gemstones can be challenging to photograph because of their reflective nature and intricate cuts. To capture the brilliance of gemstones, your focus needs to be precise.
How to Focus Correctly:
- Use manual focus to zoom in on the gemstone’s center. This allows you to adjust the depth of field more accurately than automatic focus.
- Highlight the facets by angling your light to create beautiful reflections within the stone.
- Focus on the gemstone’s brightest points, ensuring the rest of the jewelry remains sharp but does not overpower the stone.
If your gemstone is particularly shiny, try using a polarizing filter to reduce glare and create more balanced reflections. Learn how to shoot gemstones perfectly.
4. Keep Reflections Under Control

Jewelry is highly reflective, especially metals and gemstones, making it easy to capture unwanted reflections like your camera, hands, or surroundings in your photos. Managing reflections is critical to ensuring a clean, professional look.
Ways to Reduce Reflections:
- Use a light tent or softbox to diffuse the light evenly and soften any harsh reflections.
- Angle your jewelry and lights so that reflections are minimized in your shots.
- Use black or white foam boards around the jewelry to block reflections from surrounding objects.
- For metals, experiment with placing a large piece of white paper directly in front of your jewelry, reflecting clean light back into the piece.
Reflective jewelry can be difficult, but with the right setup, you can control unwanted reflections and highlight the beauty of your jewelry. Check out tricks to manage jewelry reflections.
5. Choose the Right Lighting

Lighting is one of the most important elements in jewelry photography. The way light interacts with jewelry can make it shine or flatten its details. The key is to use soft, diffused light that highlights the sparkle without overwhelming the viewer with harsh reflections.
Tips for Perfect Lighting:
- Natural light is often the best choice, but only if it's diffused. Direct sunlight can cause harsh shadows and overexposure.
- A lightbox helps create soft, even lighting that reduces shadows and reflections, making your jewelry pieces appear more polished.
- Experiment with side lighting to enhance the texture of metals and bring out the depth of gemstones.
- Explore how natural light improves jewelry shots.
For a studio setup, use LED lights with adjustable intensity so you can fine-tune the brightness based on the material you're shooting.
6. Use a Macro Lens for Detail

Jewelry pieces, especially those with intricate designs, require close-up shots to capture their finest details. A macro lens is essential for this task as it allows you to get up close and personal without losing clarity.
Benefits of Using a Macro Lens:
- It magnifies the subject, allowing you to showcase small details like prongs, cuts, and settings in high resolution.
- It creates a shallow depth of field, which helps isolate the jewelry and blur out distracting backgrounds.
- Use a lens with a focal length between 60mm and 100mm for ideal close-up results.
When shooting, focus on one area of the jewelry—such as a gemstone—while letting the rest of the piece gently blur into the background. Check out tips for choosing the right macro lens.
7. Stabilize Your Camera with a Tripod

Even the smallest movement can cause blurry jewelry photos, especially in macro photography. A tripod helps eliminate camera shake, ensuring your images stay sharp and crisp.
Tripod Tips:
- Use a small, flexible tripod for close-up shots. These are lightweight and easy to adjust in tight spaces.
- Combine your tripod with a remote shutter release to avoid shaking the camera when you press the shutter button.
- Ensure that the tripod is positioned directly in front of the jewelry for balanced, centered shots.
In some cases, you may want to angle your camera slightly downward or upward to capture more dramatic angles of your pieces. Read why tripods are important for jewelry photography.
8. Experiment with Props
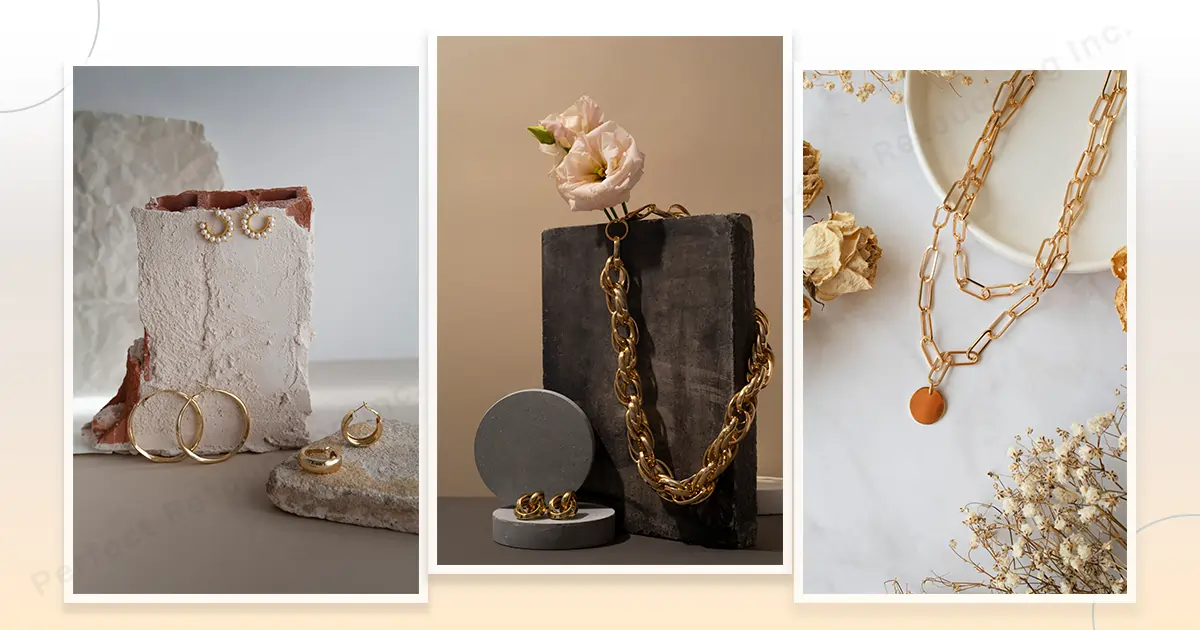
Props can elevate your jewelry photography by adding context or style to your shots. However, it’s important not to let them distract from the main subject: your jewelry. When chosen correctly, props can highlight the elegance of your pieces and create a more engaging image.
Prop Ideas:
- Natural elements like flowers, leaves, or stones can complement nature-inspired pieces.
- Textured fabrics such as velvet, silk, or leather can add luxury and contrast to your images.
- Use reflective surfaces (like mirrors) to make your jewelry sparkle without overwhelming the composition.
- Try DIY props for creative jewelry photos.
Remember, less is often more when it comes to props. Use them sparingly to enhance your photos without overpowering your jewelry.
9. Use a Neutral Background

For a professional, polished look, a neutral background is essential in jewelry photography. Simple white or gray backgrounds keep the focus on your jewelry and help it stand out, especially for e-commerce listings and catalogs.
Why Choose a Neutral Background:
- It keeps the viewer’s attention on the jewelry, without distractions.
- It provides a clean, consistent look for online stores and social media.
- Neutral backgrounds also make post-processing easier, as it’s simpler to adjust contrast and brightness.
- Discover creative background ideas for jewelry photos.
To achieve the best results, use a lightbox with a plain backdrop or experiment with AI tools like Assembo.ai to generate perfect backgrounds for your jewelry shots.
10. Post-Processing: Edit with Precision
Editing is the final step that brings your jewelry photos to life. Post-processing allows you to fine-tune details like exposure, contrast, and sharpness to ensure your jewelry looks its best.
Post-Processing Tips:
- Use tools like Adobe Lightroom or Photoshop to adjust brightness, contrast, and color balance.
- Retouch the jewelry to remove any imperfections, such as dust spots or scratches that might not have been visible during the shoot.
- Use the clone tool or healing brush to get rid of any unwanted reflections or blemishes.
- Learn about editing jewelry photos.
Even small edits can make a big difference in presenting your jewelry in the best light. Post-processing also ensures that all your images look consistent, which is important for branding.
Final Thoughts
By following these jewelry photography setup tips, you can capture stunning, professional-quality images that showcase your jewelry at its best. From cleaning and lighting to focusing on gemstones and controlling reflections, every detail counts. Experiment with your setup, and use tools like Assembo.ai to simplify your workflow and create custom backgrounds with ease.