
Affordable product photography doesn't have to mean low-quality results. Many small businesses need affordable product photography solutions that fit their budget. With the right approach, you can create stunning images that drive sales without spending a fortune. This guide covers 12 affordable product photography ideas that deliver professional-looking results. No matter if you're just starting out or looking to improve your existing photos, these affordable product photography tips will help you create images that make your products shine. Let's dig in to these practical and affordable product photography techniques that anyone can use.
1. Use Natural Light for Professional Results
Natural light is one of the most affordable product photography tools available. It's free, readily available, and can create beautiful, soft lighting for your products. Research shows that natural light photography produces more dynamic and interesting images compared to artificial setups.
- Key benefits of natural light:
- Completely free to use
- Creates soft, flattering shadows
- Easy to set up without special equipment
- Works for most product types
Position your product near a large window but avoid direct sunlight, which can create harsh shadows. The best time for natural light photography is during overcast days or when the sun isn't directly shining through the window.

2. Use Assembo.ai to Create Custom Backgrounds
Assembo.ai offers an affordable product photography solution that lets you create professional backgrounds without physical props. This AI tool helps small businesses generate custom settings for their products in minutes, saving both time and money on physical setup costs.
- How Assembo.ai works:
- Upload your product image
- Choose from various background styles
- Generate professional-looking product photos instantly
- Download and use across your marketing channels
This approach eliminates the need for expensive backdrop materials and studio space, making it one of the most cost-effective solutions for affordable product photography on the market today.

3. Build Your Own Lightbox
Creating a DIY lightbox is a smart way to achieve professional lighting for affordable product photography. A lightbox provides even, shadow-free lighting that makes your products look clean and professional.
- Materials needed:
- Large cardboard box
- White poster board or paper
- White fabric or tracing paper
- Desk lamps or clip lights
- White LED bulbs
According to product photography experts, using a lightbox is particularly useful for small to medium-sized products that need consistent, even lighting. The total cost for a DIY lightbox is typically under $20, making it an extremely affordable product photography solution.

4. Use Your Smartphone Camera
Modern smartphones can capture excellent product photos when used correctly. You don't need an expensive DSLR camera for affordable product photography – your phone might be all you need.
- Smartphone photography tips:
- Use the highest resolution setting
- Clean your lens before shooting
- Use manual focus for sharp images
- Shoot in well-lit conditions
- Use a tripod to avoid camera shake
Many smartphone photography guides show how to achieve professional results with just your mobile device. With proper lighting and technique, smartphone photos can rival those taken with professional equipment.
5. Create Simple White Backgrounds
White backgrounds are standard in product photography because they keep the focus on your product. Creating a white background setup is both simple and affordable.
- Affordable background options:
- White poster board ($7 for 10 sheets)
- White seamless paper rolls
- White foam boards
- White wall or large white surface
As suggested in product photography resources, pure white backgrounds are easier to edit to pure white in post-processing compared to off-white or cream options. This simple approach can significantly improve your affordable product photography results.
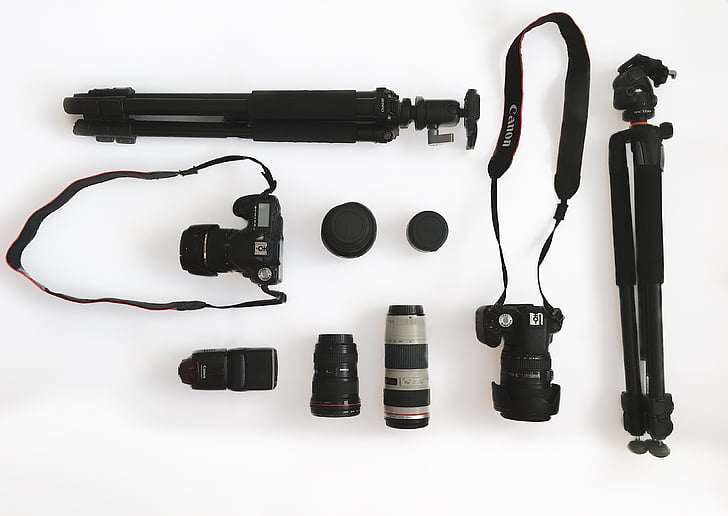
6. Invest in an Affordable Tripod
A tripod is one of the most important tools for affordable product photography. It keeps your camera steady and ensures consistent framing across all your product shots.
- Why a tripod matters:
- Eliminates camera shake
- Allows consistent composition
- Enables longer exposures in low light
- Helps with product consistency
You can find quality tripods for less than $30, making them an affordable investment that significantly improves your product photography results. Look for tripods with adjustable height and a stable base.

7. Use Everyday Items as Props
Props help tell your product's story without expensive specialized items. For affordable product photography, look around your home or office for items that can enhance your product shots.
- Prop ideas from everyday items:
- Books and magazines
- Kitchen utensils
- Natural elements like plants or stones
- Fabric scraps or textiles
- Office supplies
Remember that props should enhance your product, not overshadow it. Choose props that complement your product's color and style while keeping the focus on what you're selling.

8. Use Free Editing Software
Post-processing can significantly improve your product photos, and you don't need expensive software for good results. Several free options provide professional-level editing capabilities.
- Free editing software options:
- GIMP (similar to Photoshop)
- Darktable (for RAW processing)
- Canva (basic editing and templates)
- Photopea (online Photoshop alternative)
- Built-in phone editing apps
Learning basic editing skills like color correction, background removal, and exposure adjustment can transform your affordable product photography into professional-looking images without additional costs.

9. Shoot Multiple Angles and Details
Showing your product from multiple angles helps customers understand what they're buying. This approach doesn't cost extra but significantly improves your product presentation.
- Important angles to capture:
- Front view
- Side view
- Back view
- Close-up details
- In-use shots
- Size comparison shots
Keep your camera and tripod in the same position during the shoot, rotating the product instead. This ensures consistency across all your product images and makes your affordable product photography look more professional.

10. Maintain Consistency Across Photos
Consistent product photography helps build brand recognition and makes your online store look more professional. Consistency doesn't cost extra but requires attention to detail.
- Elements to keep consistent:
- Lighting style and direction
- Background color and texture
- Product positioning and angle
- Image composition and cropping
- Editing style and color treatment
Creating a shot list and following the same process for each product ensures your affordable product photography maintains a consistent look that reinforces your brand identity.

11. Try Outdoor Lifestyle Shots
Outdoor settings provide natural backgrounds and lighting for your product photos. Lifestyle shots show your products in real-world contexts, helping customers imagine using them.
- Outdoor shooting tips:
- Shoot during golden hour (early morning or late afternoon)
- Use overcast days for even lighting
- Find interesting natural backgrounds
- Keep the product clean and visible
- Use a reflector to fill shadows
Outdoor photography is completely free and can create exciting, engaging product images that help tell your product's story and connect with customers emotionally.
12. Consider Affordable Photography Services
When DIY isn't enough, affordable photography services offer professional results without the high cost of traditional studios. Services like Pronto provide professional product photos for as low as $36 per image.
- Benefits of affordable services:
- Professional quality without equipment investment
- Consistent results across all products
- Time savings compared to DIY
- Access to professional photographers
- Scalable as your business grows
These services are particularly valuable for businesses that need large volumes of product photos or lack the time to handle photography themselves while maintaining affordable product photography budgets.
Final Thoughts
Affordable product photography is achievable with the right techniques and tools. From using natural light and smartphone cameras to exploring DIY solutions and affordable services, there are numerous ways to create professional-looking product images without overspending. Remember that quality product photos are an investment in your business – research shows that 93% of consumers consider visual appearance the key deciding factor in purchasing decisions. Start with these affordable product photography ideas and gradually improve your techniques as your business grows. The most important thing is to begin capturing better product images today, no matter your budget constraints.